
TUTORIALS: TIRE AND WHEEL RIM, Part 2
MODELING
Model the Wheel Rim
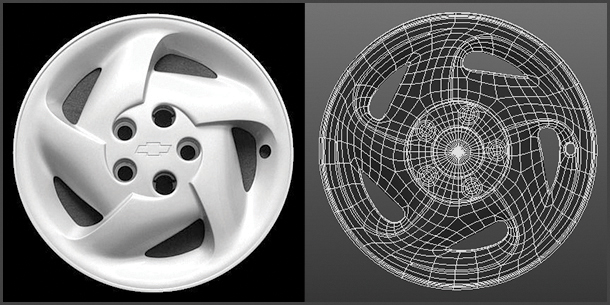
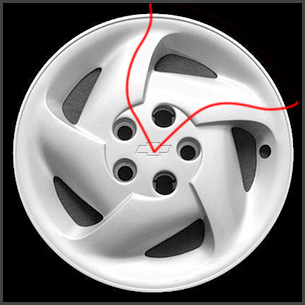
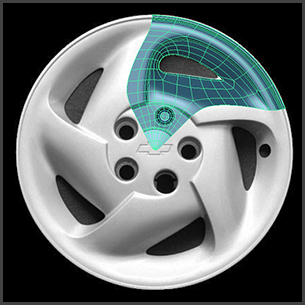
The reference image for the wheel rim uses a 5 part rotational symmetry. I want to select as my basic modeling unit, a section whose edges intersect as little detail as possible.
I place the reference image on a square plane, parallel with the side orthographic view. The plane is sized to line up with the tire, but for ease of modeling, centered within the world. I will continue to use the smooth mesh preview as a guide for modeling.
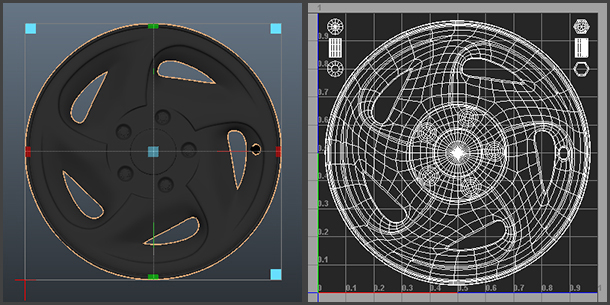
I start with a circular plane which is extracted from a cylinder cap. In creating the initial cylinder, I want to set Axis Subdivisions to be multiples of 5 (for my 5 part symmetry) and for this model, I have chosen 35. The goal, as always, is to be economical with polygons without sacrificing too much quality. I have also set the Cap Subdivisions to 4 to give me some basic resolution with which to start.
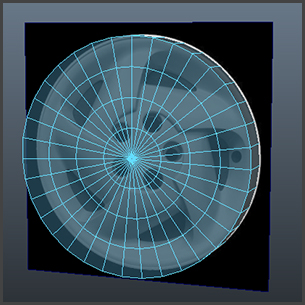
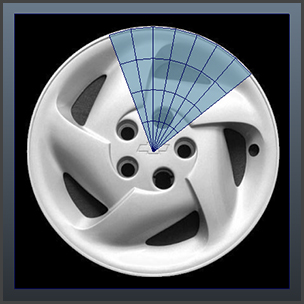
I delete the side and back facing polygons, along with all but a fifth of the front facing polygons. These remaining polygons will form the basis of the wheel rim mesh.
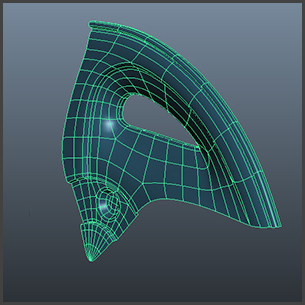
Starting out flat and working in the orthographic view, I primarily use the Interactive Split Tool and the Insert Edge Loop Tool, both located under the Edit Mesh pull down tab, to define the contour lines. After I have roughed out the shapes, I convert any triangulated polygons into quadrangles, for a mesh that deforms better when smoothed.
In order to insure that the edges along the segment boundaries will align properly when copied for the remaining sections, I create an instanced object and rotate it 72 degrees, which will allow me to easily align and snap vertices, as I refine the mesh.

At this point, I also add some depth to the mesh. Since the topology will be somewhat complicated and interlocking for this object, I have assigned a Phong shader instead of a default Lambert. The shiny surface will help flag any surface irregularities.
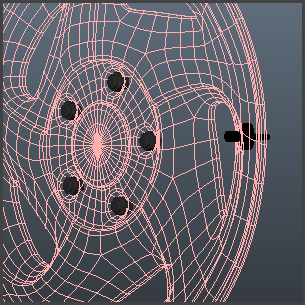
Under the Edit/Duplicate Special features, I specify 4 copies, each rotated 72 degrees and merge all the coincidental vertices to form the hub mesh. I also add a hole in one of the section for the tire valve stem.

Next, I add lug nuts and the valve stem. These extra details help add a touch of realism to my scene. I model just one lug nut, group it on to itself, which then sets the pivot to the center of the world. I make sure that the original lug nut and grouped pivot are in place, and just as I was able to make 4 duplicate hub sections, I also duplicate and rotate the original lug nut by 72 degrees each time.
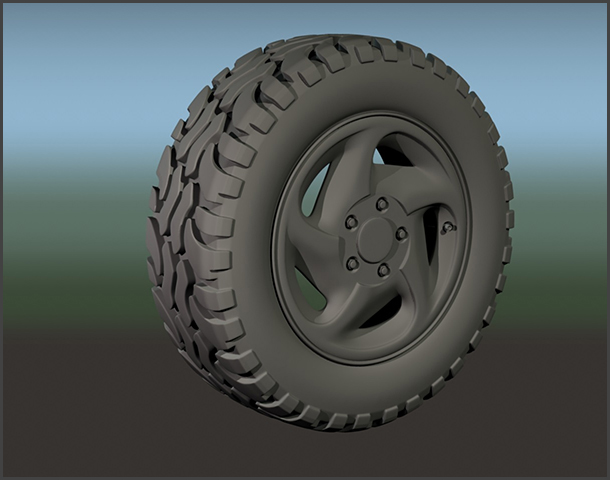
Once all the modeling components are completed, I align the tire's position with the wheel rim, after which I group all the wheel components together, and use the group's coordninates to position and orient the wheel within the scene when composing my rendered image.
I want to check the model in test renders using Mental Ray. The Mental Ray renderer not only provides users with some beautiful texture options, but it also allows me to render the smooth preview without formally subdividing the mesh. This feature is extremely handy for iterative modeling passes -- but can only be used with the Mental Ray for Maya renderer. In order to obtain smooth render effects, you must enable the Export Triangulated Polygons option in the Render Settings/Mental Ray /Options tab under the Translation/Performance sub-section.
If Mental Ray does not show up as an option for rendering, select the Window/Settings Preferences/Plug-in Manager and scroll down to Mayatomr.mll and check the load option boxes.
Assign the Wheel Rim UV's
Next, I assign UV's to the wheel hub using a planar projection along the X axis and then add UV assignments for the lug nuts that are scaled in the upper corners, since they will be sharing the same shader. The valve stem mesh will be assigned its own shader. (Please refer to the tire UV assignment section for a more comprehensive lesson on how to assign a planar map.)
The tire is now ready for texturing, which I will cover in the next section.
![]()
![]()
![]()